Secret Base of Cobolt
Stage-Select Name: Secret Base of Cobolt
Map Name: Secret Base of Cobolt
Summary[]
- Difficulty: 10/10
- Max Players: 8
- Party Requirement: ?
- Time to Complete: ? min
Introduction to the Secret Base of Cobolt[]
| Lv60 Adaman Titan | |
|---|---|
| |
| Type: | Boss |
| Speed: | Middle |
| Attacks: | Misc. |
Secret Base of Cobolt is an raid stage (8-player maximum) for level 50+ players only. It generally takes 30 to 60 minutes to complete and offers good repeatable exp and various good items. This guide is meant to show new players how to gain entry and describe the various tactics used to complete this stage quickly and safely.
Accessing the Stage[]
To unlock this stage, you need to beat Legend Cobolt Battlefield, which requires a Stone Carved Key from the land spirits in 3-3 to unlock. You can also have someone who has previously cleared Cobolt Battlefield open it for you with their token. Save either the Injured Cobolt or Injured Land Spirit, then complete all of their quests to unlock Secret Base of Cobolt. The side you choose to help will determine which ring you receive at the end. For more information about the two sides, see the Rewards section at the end.
To access the stage, you will also need Cobolt King's Secret Key (obtained by defeating the boss at Legend 3-4 or as a common drop from the Cobolt Captains inside the raid, used up when you pass the raid's door) or "Key to a heavy duty secret base" (obtained as a rare drop from the Cobolt Captains inside the raid, lasts forever).
Special Tactics[]
Because Secret Base of Cobolt is currently our endgame and arguably the one of the more complex stages to complete or rush, a number of tactics have been developed that are especially emphasized in speed runs of this stage in order to finish quickly and safely.
| Lv60 Adaman Akun | |
|---|---|
| |
| Type: | Boss |
| Speed: | Middle |
| Attacks: | Misc. |
Blocking[]
This is when someone stands in front of a mob while the rest of the party attacks from a distance. Because the mob will be targeting someone who is far away, it will attempt to chase them, but not be able to move due to the blocker. This tactic only works against enemies that will not attack when someone is on the edge of their range, and so is best used against the Black Sand Scorpion Kings and Cobolt Captains.
Down attack spamming[]
Probably not the best name for this, but basically, because you have 8 people, the fastest way to clear most ordinary enemies in this stage is to group them up, knock them down, and spam down attacks on them. If you really want to move quickly, this is the tactic you should use on everything that can be knocked down.
Provoke chaining[]
This refers to having two knights, both with Provoke 5 (max), alternating their provokes on a target or group of targets in order to allow the rest of the party to attack safely. As long the knights can hide behind something or a healer can be spared to watch them, this is better than an Ice Barrier when dealing many of the enemies because they will destroy the barrier quickly from so many hits.
This tactic is also useful against trapped Adamans; with a proper provoke chain, the rest of the party can go behind the Adaman(s) and use all their attacks to finish the fight quickly.
| Lv60 Adaman Tera | |
|---|---|

| |
| Type: | Boss |
| Speed: | Middle |
| Attacks: | Misc. |
Trapping[]
This could arguably refer to a variety of tactics, but is usually referring to trapping the Adamans. Basically, there are small glitchy areas on the wall on which players and monsters can both get stuck when trying to run along the wall. Trapping is luring the Adaman to run into the wall, then along it so that it gets stuck on one of these areas, and standing at a sufficient distance so that the Adaman constantly tries to do its dashing punch attack but misses due to the range. After that, it can be sniped, or a provoke chain or damage aggro can be used to allow other players to go behind it and attack.
The Stage Itself[]
Secret Base of Cobolt can be loosely divided into several sections, which is how I'll be organizing this guide. These are the following:
- 1. Outside the base
- 2. Cobolt barricades
- 3. Secret base hallway
- 4. Cobolt army
- 5. Scorpion army
- 6. Golem army
- 7. Cactus army
- 8. pre-Adaman guards
- 9. the Adamans
Dialogue Variation Chart[]
http://i111.photobucket.com/albums/n142/ScorpiaX/untitled-63.jpg
Section 1: Outside the base[]
You start off in a small room with 2 quests available; pick those up, as they provide a lot of experience. Once someone opens the door, their key is used up and no more people can enter the stage, so be careful not to open the door until you're sure everyone is ready.
The initial area is filled with land spirits of various sizes. The smaller ones should be gathered together with Provoke and/or Ice Barrier, then killed with AOE attacks. The medium ones should be pushed to a wall and killed with normal attacks, as they are far more deadly. For a speed run, you can also bring all the medium spirits together and AOE them as well, but be warned that this is significantly more dangerous.
You'll also be introduced to the "hand" here; an invisible enemy that continually reaches up with an earthen hand, grabbing you, knocking you down and causing minor damage as long as you're within range. It can be provoked or induced to attack a Moon Barrier, and will appear in various places throughout the stage. It mostly serves to make it difficult to hide in "safe" spots, except for at the boss.
After the initial section, head south--you can get reagents, sometimes a Jewel of Life, and a special stage buff if someone has brought 3 Magic Concentration Stones. If you have stones, walk into the orb near the reagents to buff the party; make sure you wait for everyone to come into the room before you do this.
In the next section, there will be large numbers of Antlion Pits and Baby Dragons. Use skills that move you forward to get through the slowing effect, and AOE knockdowns to clear paths through the dragons. Try to protect FS-build Healers and Wizards as they generally have the hardest time getting through if the dragons go after them. Once you reach the end of this area, there will be a gate you need to break down; one or two people should keep the dragons off everyone while the party breaks though.
In the final outdoors section, you will face a few Raptors, another pack of Baby Dragons, and possibly some Medium Land Spirits. Kill all of the raptors and dragons to proceed. There may be another Jewel of Life before you enter the tunnel.
Section 2: Cobolt barricades[]
As soon as the first person enters the tunnel, a Cobolt Warrior will spawn and begin running to the end. If he reaches the Reavers, you'll have to fight twice as many--obviously this is a bad thing, so the first person should immediately rush over and juggle the warrior toward the entrance so this doesn't happen. One or two people can stay there to help and make sure the warrior doesn't escape and that other cobolts don't mob and kill anyone. The rest of the party should head to the right and begin fighting the reaver(s) (either 1 or 2). Once the back reaver is killed, an additional reaver will spawn. If the reavers are killed before the warrior, do not go any further. Doing so will glitch the stage, and you will not be able to complete it.
After the reavers, you will be faced with several barricades loaded with Cobolt Catapulters, Warriors, and Trappers, as well as their High-Ranked counterparts. One person should go ahead, lure all of the High Ranking Cobolt Warriors back to the beginning, and trap them inside one of the barricades. Then, knock them down and spam down attacks to kill them all. Clear your way through the barricade carefully, and do not get ahead of your healers; the arrows can deplete your health very quickly, at which point stray bombs and boomerangs tend to find you.
Healers can use SSA and Wizards can use Bitter Cold Breath to move enemies onto their side of the barricade for easier killing; you can also go behind the barricades and knock cobolts over if you're careful about it. If the initial lure was done well, the main danger will usually be the four High Ranking cobolts near the end: two catapulters, a trapper, and a medic. Try to isolate and kill those as quickly as possible when you reach them.
Section 3: Secret base hallway[]
You won't be spending much time here, but it does deserve a mention. All of the following rooms (which must be cleared in order) are connected to this hallway, which has three Chariots patrolling it, just like the one in 3-3. However, these chariots leave bombs behind them as they move which do about 1000 damage if stepped on. Because of this, someone should lure or Ice Barrier them to prevent them from blocking the hall completely with bombs. Should the hall become filled with bombs, the following skills can allow you to detonate the bombs safely and pass through without waiting for the bombs to explode naturally:
- Light Shield
- Moon Barrier
- Magic Defense
- Flying Dragon Sword
- Surprise Attack
Section 4: Cobolt army[]
This room is the first on the north side of the hallway. It features a large number of normal Cobolt Catapulters and Warriors, as well as quite a few of their High Ranking counterparts. The general strategy is to knock them all to the top of the room, then spam AOE knockdowns and down attacks to take them out. Do not break the Sleep Pumps in this room; doing so will summon reinforcements. The only real danger here is being trapped by multiple High Ranking Warriors or a stray High Ranking Catapulter's boomerang, so make sure to go after them first and this room should be fairly easy.
Section 5: Scorpion army[]
This room is the second on the south side of the hallway. It features a large number of Poison Sting Scorpions, several Sand Scorpions and Sand Scorpion Solders, two to four High Ranking Cobolt Catapulters, and one or two Black Sand Scorpion Kings. The Scorpion Kings may be lured out of the room if you have time and trapped outside the barrier; otherwise, you should immediately run to the small room at the bottom right. There, someone can stand in the way of the Scorpion Kings in the small entryway while the rest of the party uses ranged attacks to hold their attention and kill them safely. There is a hand in this room, so whoever gets it (initially, it will be the first to enter the room) should go to the top left or slightly below the entryway to make sure it doesn't knock down the blocker. Note that Provoke will temporarily attract the hand, and that it will switch permanently if its target runs out of range (bottom and right edges). Also, be aware that a scorpion that burrows, then comes back up directly underneath the blocker can cause the Scorpion Kings to be able to move through them.
Even if the Scorpion Kings are trapped outside, someone should still go to the small room; it always contains a Jewel of Life and two chests with apples/meat, and sometimes reagents.
After the Scorpion Kings are killed, head back into the main room, gather up all the Scorpions while isolating and killing the Cobolt Catapulters. As always, Catapulters should be the main priority, followed by AOEing the scorpions. Use the same tactics, AOE knockdowns and down attack spamming.
Section 6: Golem army[]
This room is the first on the south side of the hallway. It features miniature Golems with two to four High Ranking Cobolt Catapulters, plus a reinforcement wave of more Golems plus four more Catapulters. Golems are basically small Rotem Guardians--they have all the same melee attacks, just missing the AOE ground slam and the rock pillar attack. They still do stun with many of their attacks, so getting hit can make you an easy target for the Catapulters. However, most of their attacks do relatively low damage--you are only likely to be killed by Golems if they manage to trap you in a corner.
Two players (Knights or Wizards with maxed Provoke or Ice Barrier) should gather all of the Golems. A sufficient amount of the party should go after the Catapulters (one person for each is good) while anyone else AOEs the Golems. Once most of the Golems are dead, the second wave will spawn, and it should be handled in a similar manner.
Section 7: Cactus army[]
This room is the third on the north side of the hallway. It features a Thorny Captain, numerous smaller cacti, and one to four High Ranking Cobolt Catapulters. As always, Catapulters should be the first target, with one person going for each catapulter if at all possible. They are always around the center, so rush in and knock them to the bottom left corner, where the rest of the party should be clearing the cacti to make a "safe" corner from which to clear the rest of the room.
One person should run up to the top/top right and use Provoke, Ice Wall, and/or ranged attacks to get the Thorny Captain's attention, so that it won't cause trouble for the rest of the party. One or two party members, including a healer, should generally try to keep the rest of the enemies away from the lurer and make sure he or she stays alive.
Clear all of the smaller enemies first, then heal up and kill the Thorny Captain. Once it dies, 8 Thorny Cacti will spawn around the room. In a full party, one person should attack each cactus, so that they will be unable to attack the party. If you have less than 8 people alive, or if people are badly injured, regroup on one side of the room (usually the left) and split your attackers amongst the four cacti on that side while any healing necessary is done, then move to the other side.
Section 8: pre-Adaman guards[]
This room is the second on the north side of the hallway. It features a small pack of Cobolt Catapulters, Warriors, Medics, and Trappers, along with 3 Cobolt Captains, a Black Sand Scorpion King, and a Reaver. Upon entering this room, kill the 3 Cobolt Captains. You can use Provoke and/or Ice Wall to control them, but an easier way would be to have 1-2 people block them at the top left corner of the room. After the first Captain dies, a Black Sand Scorpion King spawns; kill that, then go back to the Captains. After the last Captain dies, a Reaver will spawn; finish it off along with any other small cobolts still around.
Once all enemies in this room are cleared, the north barrier will disappear and the Adaman room will be open.
Section 9: the Adamans[]
This room features Adaman Tera (blue), Adaman Akun (yellow), and Adaman Titan (red). They look just like and behave similarly to Rotem Guardian, with a few minor differences. A Knight's Magic Defense skill makes him completely immune to everything here. (Possibly a glitch, as I don't think being punched is very magical.)
<font=Arial>
- Adaman Tera (blue) <font=Arial>
- has a slow dashing attack
- AOE quake skill has no knockdown/stun, high range
- summons ice pillars and snowballs instead of earth pillars and boulders
- spawns a Reaver upon being destroyed
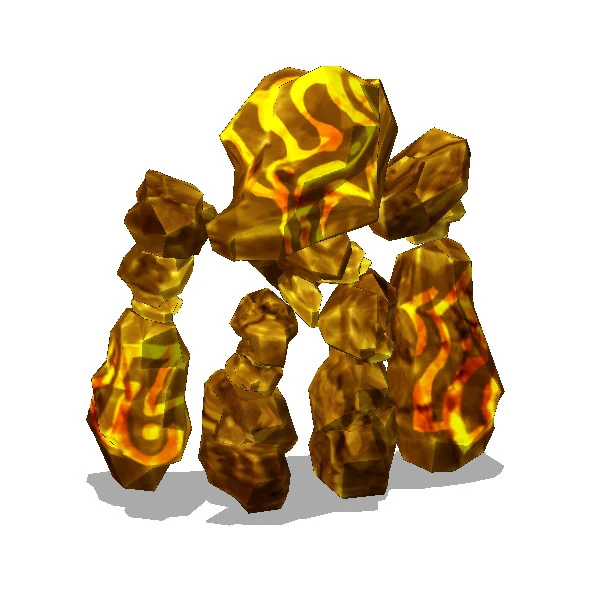
- Adaman Akun (yellow) <font=Arial>
- has a medium speed dashing attack
- AOE quake skill has short range, stuns
- summons fire instead of earth pillars that leaves a strong burn effect (~20 damage per second)
- spawns a pack of Cobolt Warriors and High Ranking Cobolt Warriors upon being destroyed
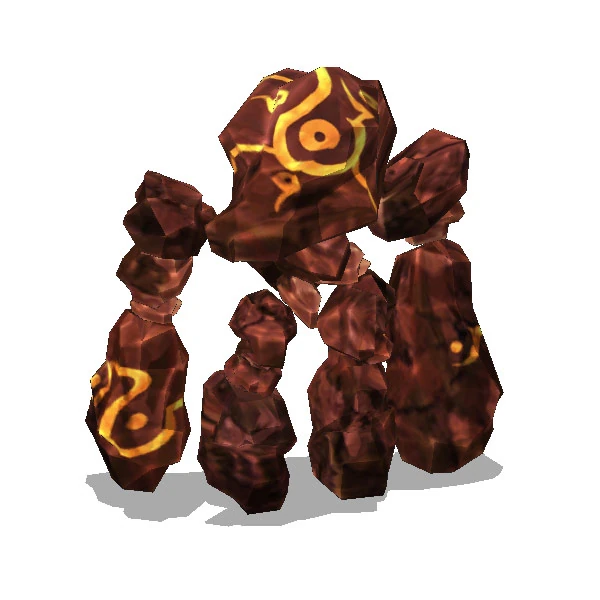
- Adaman Titan (red) <font=arial>
- has a very fast dashing attack
- AOE quake skill has high damage, short range, launches
- has a spinning attack that deals extremely high damage at moderate range in front
- spawns a pack of Golems upon being destroyed
The hand is very active throughout this room except on the very edges, unlike most of the stage where it serves to prevent you from hiding near a door; this tends to make standing still anywhere in the middle of the room while Adamans are loose very dangerous, especially if one (or more) is actively chasing you at the moment.
Trapping tips - Assuming you have someone who knows how to do it, trapping the Adamans is currently the safest and fastest method we have for killing them. See the "Special Tactics" section above for an explanation.
While it's difficult to explain how a skilled trapper works, there are some general tips and principles you should be aware of.
While trapping Titan, be very aware of the range of his spin attack. If you're not expecting it, it can easily cost you a life. Akun and Tera dash too short of a distance to easily get them to run straight into the wall--it's much easier to bring them in at a diagonal.
If Akun or Tera are too close to the wall to bring it in, even diagonally to the wall, bring it directly away, then diagonal toward the wall twice. Titan is handled similarly, although you can bring it in vertically or horizontally.
Be very careful not to move out of range of your Adaman, especially if yours is not the only one loose. Many people won't be able to survive for long if they end up with two Adamans chasing them. Provoke is a last resort--use damage to get an Adaman to follow you if at all possible.
Do your best not to need heals. Use potions, and if you must call for a heal, unload some high-damage attacks into your Adaman to make sure you don't lose it to healing aggro.
Here are three screenshots, showing the three most common trap spots.
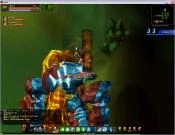


kStyle" strategy - One to three people lure and trap all of the Adamans in the same place on the right wall, where they are killed simultaneously either by sniping or from behind with the help of a Provoke chain.
Generally requires three competent lures to do safely, as a missed trap can kill another lurer and there are currently only a few players on global Soldin who are capable of reliably trapping two or three Adamans at the same time by themselves.
"old/gLunia" strategy - One person lures Adaman Titan and traps it at the top left; one person lures Adaman Akun and traps it at the top right. The rest of the party kills Adaman Tera at the bottom of the map, kills the Reaver, and then synchronizes killing Titan and Akun. You can also trap Tera at the right side, if you so choose, and kill all three Adamans at the same time.
This tactic is good if you find yourself in a party where there are not enough players confident that they can trap all of the Adamans in the same spot.
the really old strategy - run in there, split up the party, and fight all three Adamans without trapping.
This is only a good idea if your party is skilled and/or bored.
Rewards[]
Well, aside from the experience, you'll receive a Glowing Piece of Stone when each Adaman is defeated. Open them to receive Adaman Tera's Piece, Adaman Akun's Piece, and Adaman Titan's Piece. You can take these Adaman Pieces to Cobolt Battlefield and deliver them to either the Cobolt or Land Spirit who gave you the quests, and receive Seal Boxes in return. These Seal Boxes can contain Item Boxes or various trash. Cobolt's Friendship equipment has a violet color scheme. Land Spirit's Blessing equipment has an orange color scheme.
Tera's Item Box may contain gloves, legs, and necklaces for any class. Akun's Item Box may contain weapons, specials (book/rune/cloak), and shoes for any class. Titan's Item Box may contain chests, hats, earrings, and rings for any class.