Stage-Select Name:
Map Name:
Introduction[]
Episode 2, Stage 10 is one of the most frequently played stages. For one, it's the last stage that we of the closed beta can play, and provides us with decent equipment prior to rares and uniques, therefore providing as one of the major economic centers in Lunia Closed Beta. This guide/FAQ will hopefully provide a better way for people to advance through this stage, new and old.
Terminologies[]
- Drake Run - A try at the stage.
- Drake Farming - Continiously doing stage 2-10 for Drake for Equipment, or EXP since this is currently the "best" place to level for 20s+.
- Speed Run - Attempting to finish 2-10 as fast as possible, for one reason or another.
- Leecher - A playerwho hides and stands somewhere while everyone else does the work.
- Nado / NadoHax / Tornado - Drake's Twister/Tornado attack which can sometimes catch you up to 2~5 times, which can potentially kill you from 1 hit.
- Flyer - Term used for when Drake continously uses his "Fly and Bombard" attack.
- Buffs - Spells/Skills that increases the parties stats.
How to get through the Stage, Tactics and Strategies[]
- Conserve your life - Life's Important, and it's easy to die to any of the minibosses if you're careless. The faster you die, the faster your party will be alone with Drake.
- Wait for your party to get in position for the minibosses. Alot of people hate it when people rush to the miniboss, potentially killing somebody. This remains true for Drake, wait for everyone to ready their MP/HPs, or if the healer has any Buffs they want to cast.
Monster List, and Strategy[]
Skeleton Infantry - Pretty cut and dry, slap them before they get a chance to throw their sickles or swing at you. These guys tend to come in swarms, which can potentially hurt, but can be used as an advantage. When surrounded, dash to a secluded area and try and get them bunched together. This not only kills them faster and more efficiently, but your combo meter racks up pretty nicely as well.
Skeleton General - These guys just tend to stand still at some times, use this time to capitlize on his HP. Be wary, when he attacks, he pushes you back, which gets annoying when you get pushed towards the stage's obstacles.
Gargoyle - You'll knock them down along with the miniboss sooner or later, just watch out when it attacks. Its fireball attack is pretty strong, and tend to distract you when you're using your skills with its normal attack.
Little Blade Claw Lord - The first mini boss. Usually we'd try to kill the minions off first, but they tend to die anyways even if we do target the boss only. Its easy to die if you charge in and attack senselessly. You want to hit it a few times, or with a low delay skill /Long Range Skill then run behind its back to do it again. Its biggest weakness is when he covers himself with his wings, signaling his attack, which has the biggest delay. Run to his side or back and you can get a good couple of hits.
Soul Hunter - These guys are annoying. I've gotten to countless blow for blows with these guys, DESPITE knowing its counter productive. They dont flinch, has a wide horizontal range of attack, and knocks you down everytime. You can easily use a long range skill, or use a skill behind its back. If you're going at him with normal attacks, the best way to approach this is to predict his attack, step back/to the side a bit, and attack while he's vulernable.
Hell's Knight - The second mini boss. The best way to trounce this guy is to have each person of the party cover one direction (East,West,South,North). He'll turn to one of the 4, which leaves him open for attack by the other 3. His normal attacks are easy to dodge, and leaves him open for a long time. His skeleton bomb is easy to predict since he raises his hand. His annoying skill is the Stun + Hit, which really doesn't do much damage, but is annoying when it hits you while you're using a skill and interrupts. The skill that usually claims the most lives is the one that launches a pattern of magic missles. It's hard to explain how to dodge it exactly, but try lunging towards him at the right time because his projectile curves.
Aznriceboi13's tip: You can get Hell's Knight stuck if u summon him then exit through the south pillars. But if done incorrectly it'll walk out the pillars correctly.
Ice Spirit - Annoying little buggers that slow you down. Pretty easy to kill, not much to say.
Giant Ice Spirit - This guy's tough. Tough not as "It'll kill you tough", but it'll register damage tough, which is critical when soloing or with a 4-Fighter party. They are also one of the main reasons why parties fail when they reach Drake. Whenever I see people go up against this guy, (Knights for the most part) they continously swing and tap the "A" attack. Either they think it's not worth the mp, or that they can push it back quickly enough. The end result is either you get lucky and get that "Push back attack" off, or it'll eat your hits, not flinch, and strike back for 80~120 damage. The latter being the usual result. The answer is easy, knock em down. If you're a knight, follow up and combo it, then end with a down attack. Wizards should treat it like any other non flinching monster, and healers should only occassionally hit it.
Evil Eye - Nothing special, they have two attacks, a multi hit attack that pushes you back slightly with each hit, and a knock down attack. They're pretty weak, so they tend to be neglected, but remember that they -will- interrupt your skill, and block you from escaping the miniboss's attack, if they're around you.
Evil Eye Cow's Master - Cow? What? Anyways, I hate this miniboss the most. He's gotten a few lives off of me already. If he stones you, he has the potential to Kill you at full life. What he'll do is stand there, and pound you till you die. The other 2 moves he likes to do is the eye laser (Knocks down) and tackle (Knock down and push). Both easy to dodge, and easy to predict. He'll usually start shaking and launch his attack. You can register damage before and after his attack. Take note that he is invinicble while tackling, and can inflict multiple hits if he's got you pinned against the wall. Also, there is a type of "Safe" Spot, between the two pillars to his room. From there, you can attack with long range skills, and his only retaliation will be the eye beam. Dont get too close or you'll lure him out with his Tackle.
Drake - The big cheese. There's a section specifically for him. He's special like that.
Drake Room Strategies and Tactics[]
| Drake | |
|---|---|
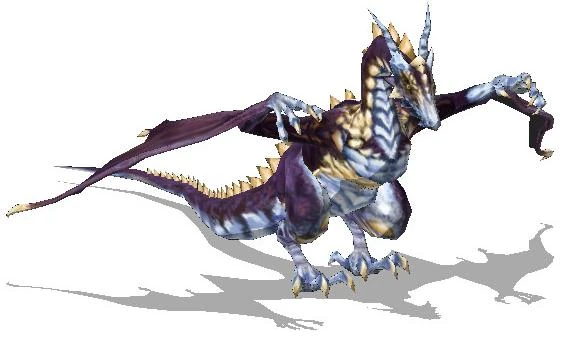 | |
| Type: | Episode Boss |
| Speed: | Very Slow on Ground, Fast In Air |
| Attacks: | Melee, Range, Reinforcements. |
| Difficulty: * * * * * * * * * | |||
| Depends on party quality | |||
| Reinforcements: | Ice Spirits | ||
|---|---|---|---|
| Ranged Attacks: | Tornados | Ice Breath | Fiery Flight |
- There are two ways to approach this, the first way is how lower lvls usually should do it, and the second is usually for higher and more experienced players.
- Seperate the party so that the attackers go to the right, and attack and kill the two ice spirits. Focus on drake afterwards, while neglecting the 3rd and last Ice spirit (Although It'll die eventually). This is so that the Ice Spirits will respawn much later, giving you more 1 on Party time with Drake, while lessening the annoyance of the Ice Spirits. This strategy is for slow damaging parties, to prevent the ice spirits from spawning mid/late game and own everybody.
- Drake has a slight lag as he lands from flying, when the battle starts. Take this time and rush into drake, attacking him with everything you've got. A second or two with 3 fighters = a chunk of his life. A couple of more seconds in, the ice spirits will start surrounding you. Use this as an opportunity to kill them all at once (Since they're grouped). Use an area (Ex : Whirlwhind kick) skill to knock them down if they get too close. Or Position yourself to hit them while you're hitting drake (Ex : Step back a little and use Destruction fist, damaging both the ice spirits and drake).
 From hp78: Note, the drake usually does not move an inch for the first few seconds. You may make use of this time to
 whoop your best-damaging skills onto drake. When the drake does fly off, you can finish off some of the ice spirits.
- The Tornados are the most dangerous for if they stack, can take a huge chuck of your life. You can predict this attack when he flaps his wings. If you do hit the floor, and tornados are still surrounding you, stay down till its over.
- Ice Breath, is usually neglected. I usually go right through it, and if you do manage to get under his neck while he's blowing, you got yourself a perfect opportunity to strike without intteruption. There's a sweet spot right in front of his face which will do 200~500 Damage, so be wary.
- Fiery Flight, dodge the shadows, and you dodge the flame 98% of the time. Use this time to run to the healer for a heal. If you're a healer, use the heal skill right after you see its shadow pass by away from you. This way, you dont get hit while healing. If he hit's you, stay down till after the enxt one passes. Less trouble dodging.
The rest of his attacks are pretty cut and dry.
- Soloing
- With enough patience, anyone can solo drake. You use a pot, wait it out up until Drake's Room. However, for the experienced, and careful, you can get there with 2 lives without having to wait for anything. The tricky part is beating mean ol` Drake by yourself.
- I suggest using the first approach if you're soloing as a healer, or low level.
- Take hits at Drake when during his vulnerable moments, such as when he uses his ice breath or slash attack (By going straight into him, he'll miss), and dodging everything else.
- Knock out the ice spirits, Down attack, and run during drake's aerial attack.
- Use em` pots whenever you get the chance.
- If your a Dainn, use a skill to provoke + Ice wall, than go to the side and spam/combo.
- With enough patience, anyone can solo drake. You use a pot, wait it out up until Drake's Room. However, for the experienced, and careful, you can get there with 2 lives without having to wait for anything. The tricky part is beating mean ol` Drake by yourself.
Speed Running[]
When people get bored, they do pointless stuff. This is one of them. Currently, as far as I know, the record is 4 Mins 36 seconds.
- Kill the mini bosses, and generals. You can run from the rest, Including the first general.
- Usually, you'd run left during the journey to the bottom right room, so that you go with the flow from the stage projectiles. However, the fastest way is the right. There is a thin space along the egde and side of the walls which you can dash towards. Knock down any Ice spirits along the way, and move on. Its tricky at first, and doesnt save THAT much time, but hey, it works.
- Go with the second strategy, abuse his lag time.
- Use MP Potions do regen MP, or Die to Regen MP.
Drops[]
Note, [?] means unsure, Boxes [2] = Loose/Rare/Great Box 2
Mob Drops[]
- Skeleton Infantry - Skeleton Soul Stone, Bone, Dungeon Key, Boxes [2]
- Skeleton General - Skeleton General's Soul Stone (?), Hard Rib, Boxes [2]
- Gargoyle - Gargoyle's Horn [?], Boxes [2], Gargoyle's Soul Stone [?]
- Little Blade Lord - Gargoyle's Horn [?], Heart Throbbing Box 2
- Soul Hunter - Soul Chain, Boxes [2]
- Hell Knight - Christina's Hair, Heart Throbbing Box 2
- Ice Spirit - Unmeltable Ice, Boxes [2]
- Giant Ice Spirit - Cold Ice Piece, Boxes [2]
- Evil Eye - Evil Eye Ball, Evil Wings, Boxes [2]
- Evil Eye's Cow Master - Evil Eye Ball [?], Evil Wings [?], Heart Throbbing Box 2
Drake Drops[]
- Drake - Drake's Sealed Box
- Drake's Sword : [Dmg 6~8, +5Int, +5Dex]
- Drake's Knight Chest : [104Def, +5Int, +5Dex, +3HP, +3MP]
- Drake's Leg Armor : [88Def, +4Str, +4Vit, +3HP, +3MP]
- Drake's Hand Armor : [40Def, +3Vit, +3HP]
- Drake's Boots : [56Def, +4Str, +5MP]
- Drake's Helmet : [72Def, +4int, +4Dex, +2HP, +2MP]
- Drake's Rune : [ HP+11, MP+11]
- Drake's Staff : [Dmg 4~7, +5Int, +5Dex]
- Drake's Robe : [94Def, +5Int, +5Dex, +3HP, +3MP]
- Drake's Pants : [79Def, +4Str, +4Vit, +3HP, +3MP]
- Drake's Wizard Gloves : [36Def, +3Vit, +3HP]
- Drake's Wizard Boots : [Def50, +4Str, +5MP]
- Drake's Hair Accs. : [65Def, +4Int, +2Dex, +2HP, +2MP]
- Drake's Cloak : [+12HP, +12MP]
- Drake's Wand : [Dmg 5~7, +5Int, +5Dex]
- Drake's Dress : [83DEf, +5Int, +Dex, +4HP, +4MP]
- Drake's Skirt : [70Def, +1Int, +1Vit, +4HP, +4MP]
- Drake's Healer Gloves : [32Def, +3Vit, +3HP]
- Drake's Dress Shoes : [45Def, +4Str, +4MP]
- Drake's Hair Band : [58Def, +4Int, +2Dex, +2HP, +2MP]
- Drake's Book : [+12HP, +12MP]
- Drake's Necklace : [32Def, +2Int, +2Str, +2Dex, +4MP]
- Drake's Neck Accessory : [36Def, +2Int, +2Str, +2Dex, +4MP]
- Drake's Neck Guard : [40Def, +2Int, +2Str, +2Dex, +4MP]
- Drake's Ring : [+1Str, +1Int, +2HP, +2MP]
- Drake's Finger Accessory : [+1Str, +1Int, +2HP, +2MP]
- Drake's Twin Ring : [+1Str, +1Int, +2HP, +2MP]
- Drake's Earwear : [+1Vit, +1Int, +3HP, +3MP]
- Drake's Lir Earring : [+1Vit, +1Int, +4HP, +4MP]
- Drake's Twin Earrings : [+1Vit, +1Int, +3HP, +3MP]
- Loose Box / Rare Box / Unique Box
- Big Unidentified Crystal : [Nothing in CB]
Credits[]
Guide was created by Stryfe